Staging: Transform Empty Rooms in Seconds
Learn how to use the staging tool to transform empty real estate photos into beautifully furnished spaces.
Staging: Transform Empty Rooms in Seconds
What is Virtual Staging and Why Does It Matter?
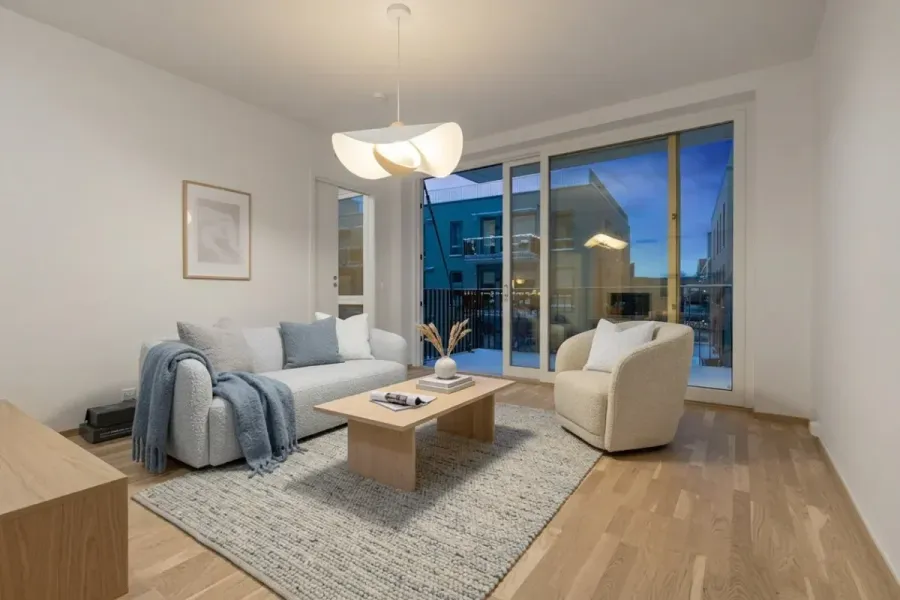
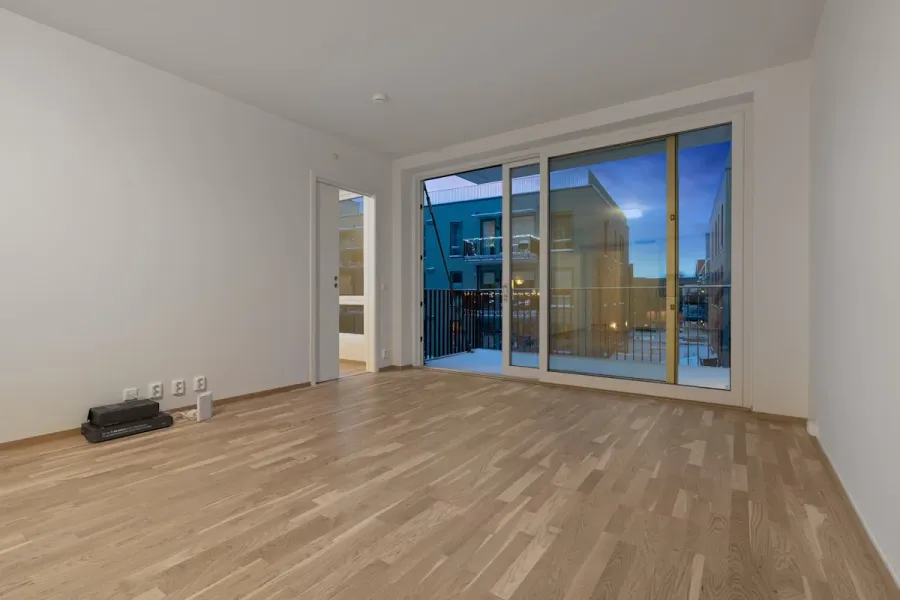
An empty room in a listing photo is a missed opportunity. Buyers struggle to picture how a space will look furnished - and without furniture, even a spacious apartment feels cold and uninviting. According to the National Association of Realtors, listings with furnished photos sell up to 20% faster than those with empty rooms.
Virtual staging solves this problem. Instead of spending thousands on physical furniture for a photoshoot, upload a photo of an empty room and the tool adds furniture, decor, and accessories in seconds. The result is a professionally designed interior that grabs buyer attention from the first click - at a fraction of the cost.
How to Use the Stage Workflow
The entire process takes less than a minute:
- Upload your image - Start with a clear photo of an empty room. Better lighting and resolution mean better results.
- Select room type - Over 20 room types - from living rooms and bedrooms to kitchens, bathrooms, offices, cafes, and medical offices. Both residential and commercial spaces are supported.
- Pick a style - 26 curated styles across 5 categories: Modern, Elegant, Natural, Creative, and Retro. Popular picks include Japandi, Minimalism, Quiet Luxury, and Boho.
- Generate - Furniture, rugs, lighting, and decor are added to match your chosen style and room proportions.
When Virtual Staging Works Best
- New developments - Developers often have bare walls and concrete floors. Show buyers the potential with fully furnished rooms in any style.
- Rental listings - Furnished photos generate more inquiries than empty rooms, even if the property is currently vacant.
- Real estate agents - Stand out from the competition with professionally furnished interiors in every listing.
Partial Staging with Masking
Standard staging replaces the entire room. But what if you already have a sofa and just need a coffee table? Or the bedroom has a bed but no nightstands?
The Masking feature solves this. Instead of staging the full image, you draw directly on the photo to mark exactly which areas should get new furniture. Everything else stays untouched.
How to Use Masking
- Upload your photo - The room can already have furniture - it doesn't need to be empty.
- Toggle "Edit partial" mode - The drawing canvas appears over your image.
- Draw your mask - Use the brush, polygon, or eraser tool to mark areas where you want furniture placed.
- Select room type and style - Choose what kind of furniture should be generated, just like in regular staging.
- Generate - Furniture is placed only in the marked areas, blending seamlessly with the existing room.
Drawing Tools
- Brush - Click and drag to paint freehand areas. Adjust brush size for precision.
- Polygon - Click to place points, double-click to close the shape. Best for clean, geometric selections along walls or floor sections.
- Eraser - Remove parts of the mask you've already drawn.
When to Use Masking vs. Full Staging
- Use Masking when the room already has furniture you want to keep, you need to fill a specific empty corner, or you want to add accent pieces without changing the main layout.
- Use Full Staging when the room is completely empty, you want to replace all existing furniture, or you're staging a new development with bare walls.
Tips for Better Masks
- Be generous - Include some floor and wall area around where you want furniture. This gives context for shadows and proportions.
- Don't mask too small - A tiny mask limits what can be placed. Make sure there's enough space for the furniture you want.
- Use polygon for straight edges - Along walls or floor lines, the polygon tool gives cleaner results than freehand brushing.
Available Design Styles
Choosing the right style makes a big difference. vizme offers 26 curated styles grouped into 5 categories:
- Modern (7 styles) - Clean lines and neutral palettes. Includes Minimalism, Japandi, Mid-Century Modern, and more. Great for new builds.
- Elegant (5 styles) - Refined and luxurious. Includes Quiet Luxury, Art Deco, and Classic. Fits upscale listings.
- Natural (6 styles) - Organic textures and warm tones. Includes Boho, Farmhouse, and Coastal. Works well in homes with character.
- Creative (5 styles) - Bold and expressive. Includes Maximalist, Eclectic, and Color Block. Ideal for standout listings.
- Retro (3 styles) - Nostalgic charm. Includes Vintage and Retro. Pairs well with older homes and townhouses.
Tips for Better Results
- Good lighting - Natural light gives much better results than dark shots. If your photo is dark, use Relight first to improve lighting.
- Empty room - Staging works best on empty spaces. If there's clutter or old furniture, use Declutter first to remove it.
- Shoot from corners - Corner angles give more context about the room's depth and proportions.
- Landscape orientation - Horizontal photos better capture the space and give more room for furniture placement.
- Sharp source photo - If your photo is soft or blurry, use Sharpen to restore detail before staging.
Try Staging for Free
Upload a photo of an empty room and see how virtual staging transforms it into a professional listing. Sign up for free - no commitment required.
Related Workflow
Staging
More from the blog
The Numbers Don't Lie: How Photos Sell Properties Faster
Hard data on how professional real estate photography and virtual staging impact sale prices, time on market, and buyer engagement. NAR 2025 statistics included.
Exterior: Perfect Atmosphere for Property Photos
Transform property exterior photos with sky replacement, seasonal changes, and atmosphere presets - from grey overcast to golden hour in seconds.
Sharpen: Restore Detail and Clarity
Sharpen blurry real estate photos - restore detail, fix soft edges, and remove noise. Perfect for phone photos, cropped shots, and downloaded images.